

After having shared a first collection of European recipes and connected memories two years ago, here is a new, special Memory Suitcase for you, again filled with cookies, cakes and personal stories from Europe. We hope some stories will make you laugh, and that some will keep you warm during the cold winter days. Have a go, fill these recipes with life and test your baking skills. And if you’re proud of your results, share some photos of your Christmas baking with us!
Charming Charlotte
Camilla from Italy is celebrating Christmas at home with her family. She is sharing some memories with us: “Charlotte is a lovely female name; for me it means Christmas. It is the name of the most typical cake from the countryside around my city and always comes at the end of my family’s Christmas meals. It used to be baked to consume fruit already fallen from trees, especially apples, not to waste them. Nowadays, it is a common Christmas sweet.
It also has a special place in my own memories: One Christmas Eve, around 15 years ago, my grandma baked the cake for the day after, and left it on the window side to get cooler. As a cakes’ lover, I could not resist and touched the cake, leaving my fingerprint on it. The next morning, I woke up very early to look for gifts that Santa should have left for me during the night. Among them was also a slice of Charlotte that had my fingerprint on it. That day I found out that all my Christmas presents came not from Santa, but from my family and felt even luckier, to have so many relatives who loved me and thought of me every Christmas.”

Ingredients for Charlotte (appx. 6 people):
The cake is made of two components: a pastry shell, stuffed with the cooked fruit (most typically, but not necessarily, apples). Everything is baked in the oven.
For pastry shell:
300g white flour 100g sugar 125g butter 1 egg 1 pinch of salt 2 spoons of baking soda
For the stuffing:
1kg apples; 75g sugar; ½ tsp cinnamon; ½ tsp grated lemon zest; 1 spoon water. (Granma’s tip: you may add also choco drops or raisins).
Preparation:
- Put the spoon of water, the peeled and sliced apples, and all the other ingredients (except the lemon zest) in a pan. Let it cook for about 15 minutes, until the water has dried completely. Then turn the fire off, add the lemon zest, mix and let it rest.
- While the stuffing is on fire, prepare the pastry. Mix all the ingredients quickly, make a ball, wrap it in the kitchen film and put it in the fridge. Let it rest for at least 20 minutes.
- Then, lay the pastry with the rolling pin, giving it a round shape. Draw two circles (around 20-25 cm diameter) and one rectangle (around 15×75 cm). In a round baking tray, covered in baking paper, put the first circle and the rectangle along the sides. Then poor the stuffing in it and cover everything with the second circle.
- Buckle the top with a fork and bake it at 200 ° -220 ° for about 50 minutes. Most important: don’t forget to let the cake rest for at least 5/6 hours before serving it (like my grandma did on the window side).
- Enjoy a great Christmas with whom you love!
A Delicious Danish Pastry with a Confusing Name
Jonas from Denmark is celebrating Christmas with his closest relatives eating rice pudding and hoping for a whole almond: “My father once told me the story how he got in contact with our Danish Christmas pastry: My mother’s parents announced that they were going to have pancakes – but he did not get pancakes at all – they prepared “æbleskiver” (or apple slices) for him. Æbleskiver are a traditional Danish pastry prepared around Christmas.
Their name tends to lead to some ‘serious’ disagreements and confusion since the pastry itself does not contain any apples. It does have a lot in common with pancakes which is why some, usually older people, call it pancakes. Æbleskiver have to be baked in a special pan that gives them the ball shape. Since it can’t be used for much more than that, it’s not that common to get home-baked æbleskiver: but in my family, we luckily still prepare them. When we eat æbleskiver it is often served with jam, sugar and icing sugar to dip the pastry in. In some parts of Denmark, it’s even made with a prune baked inside.”

Ingredients for Æbleskiver:
X 250g flour ¼ tsp salt ½ tsp baking soda 1 tsp vanilla sugar 4 dl buttermilk 100g smelted butter 3 eggs 1 tsp sugar
Preparation:
Divide the egg white and egg yolk in separate bowls. Whip sugar and egg white until airy and stiff. Mix egg yolk, flour, baking soda and vanilla sugar together. Whip the dough with an electric mixer and gradually pour the buttermilk into the dough until it is well-mixed. Pour the smelted butter into the dough. Mix the whipped egg whites into the dough and fill the holes in the pan to ¾ full with the dough at a medium heat. When the crust begins to become hard turn the crust on the side so the rest of the dough flows into the hole. Fill the rest of the hole with dough and turn the crust upside down so the hole is closed. When the entire æbleskive has a hard crust turn it regularly while being baked. Enjoy!
Little Vanilla Cookies and Smart Hands
Milena from Serbia is celebrating Christmas at home with her boyfriend and friends. They cook Christmas meal together so the kitchen is the busiest and the most cheerful place that day. “Childhood Christmas Eve smelled a lot like vanilla. Although the family itself and the way of celebrating Christmas have changed a lot for me, one thing remained the same – preparing small bite-sized cookie sandwiches with homemade jam and vanilla-scented powdered sugar. My old brown notebook contains carefully collected handwritten receipts, among them one from my late grandmother Natalija for “Vanilice” cookies.
Preparing Vanilice wasn’t just a task needed to be done days before Christmas Eve (because as you will learn later, Vanilice are better if they “sit” for a couple of days before serving), it was a whole ritual. Grandma would have cleaned our living room table and have sorted all the ingredients across it. most interesting for us children were small Rakija glasses which she used to stamp out the cookies. We were very persistent to help with the moulding and playing with shapes and sizes, and she always let us play with the dough. I think that my love for baking comes a lot from grandma and her patience in teaching me how to make a perfectly round cookie. Grandma has not been with us for a long time now, but around Christmas I remember her smart hands making small perfect shapes, and clean out the table for preparing.”

Ingredients for Vanilla Cookies:
300g lard (replacement could be butter, but cookies are softer with lard) 150g sugar 2 to 4 tsps vanilla sugar 1 egg 2 egg yolks 1 sp of lemon zest 1/2 sp of grated lemon zest 100 + 500g plain all-purpose flour apricot rose hip or plum jam for the filling powdered sugar mixed with vanilla sugar for rolling
Preparation:
Beat the lard (or butter), sugar and vanilla sugar light with a mixer for about five minutes until creamy. Stir in the egg, egg yolks, lemon juice and lemon zest. Add 100 grams of flour and mix in for a couple of minutes than add 500 grams of flour and beat until a uniform dough forms. The dough should be soft, not sticky. Wrap the dough in a plastic bag and refrigerate for at least four to five hours. Preheat the oven to 160 °C. Roll the dough out to 1/2 cm thick and cut out circles with a cookie cutter or a small brandy or rakija glass.
Bring the dough remains together again, roll out and cut out more cookies. Bake in the middle of the preheated oven for 12-15 min. until they turn golden around the edges. The cookies should still be pale and soft. Take them out of the oven and let them cool completely for at least 20 min on the baking sheet. Once they are cool make little sandwiches out of them with a jam. Roll in powdered sugar mixed with vanilla sugar and store the Vanilice in a closed tin so they don’t dry out. Control yourself for at least two days before you dig in Vanilice.
The Eternal Cookie and Other Miracles
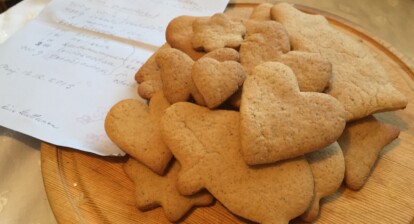
Gregor from Germany is celebrating Christmas with his parents and his sister. After playing a board game and enjoying a joint Christmas meal joining the Christmas service is important to him. “Advent time is always baking cookies (called Spritzgebäck) together with my mom and my sister. After a semester abroad in Florence, I’ve been excited to do so again this year. After the dough-preparation one day before the backing starts, everything needs to be optimal: the seasons music is prepared for listening, six backing tins are ready, and we start by laughing and thinking back to old experiences.
A favourite one is how my sister and I developed our ‘eternal cookie’, helping our mom for the first time: one cookie is baked on each and every backing tin again. In the end it always became a burned and black one. No guess why – but traditions are sometimes like that… Another kind of tradition is that our mom tells us, how she was preparing Spritzgebäck with her brother. Usually we need a second backing session in every year, as the cookies of the first one are already finished before Christmas days. We’ll see how it will turn out this year.”

Ingredients for Spritzgebäck:
1kg white flour 500g margarine (best: Sanella) 500g sugar 2 tsps of vanilla sugar 3 eggs some baking soda (Mom’s tip: you may add also chocolate glazier once the cookies are baked).
Preparation:
Put all the ingredients together and knead a pastry. The dough then needs to stand in a cool room for some hours, ideally with not more than 15-18°C. Watch out: the pastry should be very tasty, but do not eat too much, you need to save some for the baking. After having waited a while you have two possibilities:
- The traditional: For this, you need some equipment. The most important one is a mincer, that you can also see in the picture. You are setting a cookie form in front of it, put parts of the dough in it and start to mince. Spritzgebäck in the wished form should come out of the mincer, now you can cut it in the wished size and place the cookies in the backing tin.
- The improvised: Of course, not everyone has an own mincer. You can as well roll-out the dough and cut the cookies. Afterwards you can place them on the baking tin anyways.
The prepared baking tins need to be in the oven for 15-20 Minutes, depending on their thickness (180° circulating air). After backing one might add some chocolate glazier – but that depends on your personal preferences. Have a nice and tasty Christmas!


Pingback: Christmas Scents and Aromas: Warm Memories for Cold Winter Days - EUSTORY History Campus